Pages

Saturday, September 29, 2012

Hi I'm Bobbi Jo!!

I'm just so cute!! Right?


Hey Guys!! It Bobbi Jo here! mom is in the shower and I thought I would properly introduce my self!
My name is Bobbi Jo as you all know, I'm a Yorkie/ShihTzu/Poodle cross and absolutely adorable! I will be 15 years old in 14 days! (1 year in people years!) I can't wait!! I know mom will throw a big party with balloons and streamers and my very own birthday cake!! (Doggie safe!) I know all my friends will be invited! Anyway! I better go mom is getting out of the shower and would be mad if she found me on her computer! I will tell you more about my birthday party next time!!

Licks and snuggles
Bobbi Jo

Thursday, September 27, 2012

Peanut Butter Cup Brownies!!

 Hey Beauties!! So I was on Pinterest (what's new!!) when I found this recipe for these yummy Peanut Butter Cup Brownies and I mean come on whats better then peanut butter and chocolate! Plus they are so easy and take like 20 min to make! Its Awesome!! 
 I couldn't find my camera, so I only got to snap one picture on my phone!
   
Peanut Butter Cup Brownies
Source

Makes 40 brownies
Ingredients
1 box of your favorite brownie mix
1/2 cup peanut butter chips
1/2 cup semi-sweet chocolate chips
3/4 cup creamy peanut butter
Directions
Preheat oven to 350 degrees. Spray or grease 40 mini-muffin cups.

Prepare boxed brownie mix as directed. Spoon batter evenly into muffin cups (about 1 heaping teaspoon). Bake for 13-15 minutes or until top is set and a toothpick inserted into center comes out slightly wet. After brownies are out of the oven, wait for centers to fall. This will happen upon cooling. If not then tap the centers with the back of a teaspoon to make a hole for the peanut butter.

Place peanut butter in a small microwave-safe bowl. Microwave on high for 45 seconds then stir. While brownies are still warm spoon about half a teaspoon of peanut butter into the center of each brownie. Top with semi-sweet chocolate chips and peanut butter chips. Cool completely in pan. 


If you try this recipe out don't forget to leave what you thought or tips you may have in the comments below!! 

xoxo
Sarah

Monday, September 24, 2012

Laundry Quick Tip: 10 Tips For The Perfect Wash!

Hey Beauties! I having been doing my own laundry for a couple years now (my mom made me!) and at first I hated it!! but now I have gotten were I really like it! I don't really show it because I never do it unless I have to! but that only because I'm always busy! I love the smell of fresh laundry and how it so warm when it comes out of the dryer!! So I thought I would share my 10 Tips For The Perfect Wash!

Source here


1. Read the tags! All your clothes have tags on how you should properly wash it READ IT! You don't want to end up washing something that says "DRY CLEAN ONLY"

2. Stop color transferring! You got that cute new hot pink shirt and throw it in to wash with your other shirts, then when you pull it out everything you washed is hot pink!! Well here's something that could help! Wash it separate from everything else, this is what I do, when I get a new shirt and am doing laundry, when I get done with all of my other laundry I will throw my new shirt in on its own and wash it in cold water! 

3. Sort and separate! This is one thing I HAVE to do when I wash my laundry! Put whites and light colors in one basket, darks in another. Use additional baskets for extra-dirty garments or items that produce a lot of lint, such as terrycloth towels and flannel shirts. Divide heavy clothes (such as jeans) and lighter sheers and permanent-press items.
Zip zippers, tie drawstrings, empty pockets, and unroll cuffs. If you see a loose hem or a split
seam, fix it, or it will worsen in the wash. 

4. Pretreat stains! Tackle any stains before loading the washer. Presoak heavily soiled clothes for a half hour in the washer, a large bucket, or a sink.

5. Pour in detergent! Powdered detergents are better on mud and clay and in hard water; liquids have the edge on greasy stains. Use the recommended amount: Too much detergent won’t rinse out, too
little won’t clean well. Never use more than one additional product -- fabric softener, bleach --
at a time.  I love to use the new Tide Pods it detergent, softener, and brightener all in one little pod!

6. Load the machine! After adding detergent, add the clothes, distributing them evenly and loosely. Even a large load should be only about three-quarters full, so clothes can move.

7. Set the time! A short wash time of about six minutes is usually sufficient for all but the dirtiest clothes. I wash mine on a speed wash that takes 25 minutes then washing clothes doesn't take forever!

8. Choose a washer cycle! Regular -- for sturdy or heavy cottons and very dirty clothes; washer agitates and spins at high speed. Permanent press -- for most average loads; easier on clothes in general. Delicates -- for lightweight, sheer, lacy, and loosely woven fabrics; washer agitates and spins
slowly, approximating hand-washing

  9. Select water temperature! Use hot water (120 degrees) to keep whites white and to clean very dirty colorfast clothes -- in separate loads, of course. Warm water (90 to 110 degrees) is good for most average loads. Cold water (below 85 degrees) is best for bright colors that are likely to fade and delicates. Detergents are less effective in water less than 65 degrees. Shrinkage is caused by heat -- either from the dryer or hot water in the washer. To avoid it, wash items in warm or cold water, and hang to dry. Also if you use cold water to wash your dark jeans it helps keep them from fading!

10. Choose dryer setting! Most dryers have a setting called Electronic or Automatic Dry, which lets you choose how dry you want the clothes to be rather than how long you want them to dry. The Permanent Press setting has a cool-down cycle at the end to reduce wrinkling. On Air Fluff, the dryer circulates air but adds no heat; this is good for freshening pillows and reviving clothes that have been packed in a suitcase but don’t need to be washed. Or you can dry your clothes the old-fashioned way:
on a clothesline or drying rack. I hang all my delicate shirts and tops along with my jeans to dry!

Saturday, September 22, 2012

STAYING ORGANIZED: DAILY ORGANIZATION


Hey Beauties!! I have had this obsession with being and staying organized these last couple of days! And were I get my inspiration is on marthastewart.com. I have noticed that my biggest problem is once I get organized I cant seem to stay organized! Thats when I found this super cool list of Six Things To Do Everyday, and thought I would share them with you so that maybe if your like me can stay organized too!

Source here


1. Make the Bed! This is the one I am probably the worst at doing. When I get up I am so concentrated on getting up and going out and feeding the horses and finding something for breakfast, that I forget to make my bed. But if you make your bed when you get up it will make the whole room feel cleaner and less cluttered, which will help from having things pile up around it.   

2. Manage Clutter! I once read a thing that said if you take 15 minutes every day and pick up anything laying around or anything that's not in it place that it will help prevent clutter which when it come time to clean, there will be less to pick up so it wont feel as overwhelming! 

3. Sort the Mail!  Take a few minutes to open, read, and sort mail as soon as you bring it inside. Keep a trash bin near your sorting area for junk mail. Drop other mail into one of four in-boxes: personal correspondence, bills, catalogs, and filing.

4. Clean as You Cook! This is another one that I'm not very good at doing, but if you take a few minutes a clean as you cook if you mix something up in a bowl to add to you dish quickly wash it up so when you get done cooking and eating, instead of having to spend the night in the kitchen cleaning up you can sit down and watch a movie your something!

5. Wipe Up Spills While They’re Fresh! Whether it’s tomato sauce on the cooktop or makeup on the bathroom counter, almost anything is faster and easier to remove if you attend to it immediately.

6. Vacuum the floor! This is the one thing I am pretty religious at doing, but I only do every other day and I have to house dogs!  Vacuuming will help make the whole house feel cleaner without having to clean the whole house up and down plus! it only takes about ten minutes! So then if you have unexpected guests it helps you feel like the house is a little bit cleaner!

What are your tips for staying organized? leave them in the comments below!

xoxo
Sarah

Friday, September 21, 2012

Apple Crisp Pizza!!

Hey Beauties & Happy TGIF!! I thought I would share this yummy Apple Crisp Pizza, that maybe you could try out this weekend!!  Its super easy and so yummy!! I found the original recipe here for Apple Crisp Pizza and thought it looked really yummy! But when I made mine it didn't look anything like hers, it wasn't really flat like hers, but I forgot to peel my apples (that's why I stress so much on peeling them) But anyway either way it was super yummy!! Good luck!


What you'll need...

-Apples
-Pie Crust
-Sugar
-Flour
-Cinnamon
-Rolled Oats
-Butter
-Brown Sugar

What you do...


Preheat your oven to 350.  Roll your pie crust out, I used a store bought pie crust to make it easier and I don't really like making pie crusts I just used the Pilsberry ones that you roll out! 

Important!!! As you can see I made mine on a baking sheet without a lip, your baking sheet has to have a LIP!! if not as it is baking you will get apple all over your oven! trust me it happened to me!


Now folding the pie crust over to make a little edge on you crust!


Next you will cut up your apples you will want to cut them fairly small.

IMPORTANT!!! You have have have got to peal the apples, this makes it so much better and not chewy! 

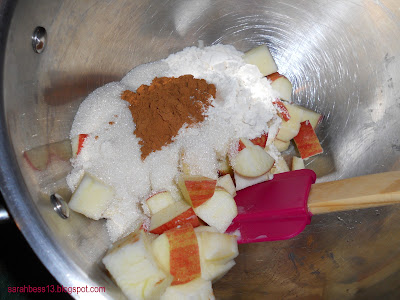
In a large bowl mix together the apples, sugar, flour and cinnamon.

Now spread your apple and sugar mixture 


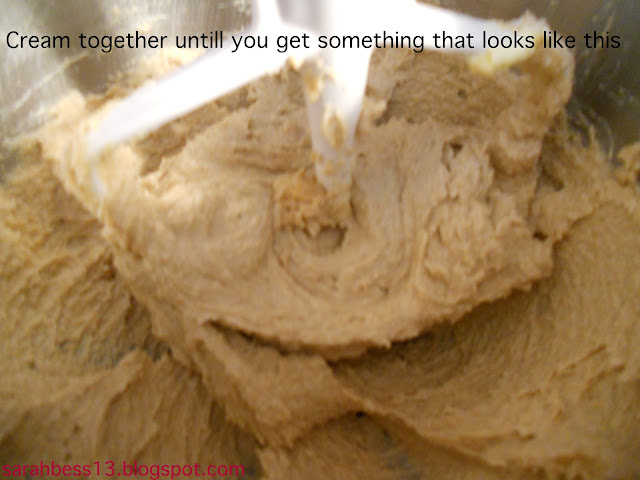
Taking a large bowl mix together your oatmeal, flour, brown sugar, butter and cinnamon


Mix it together until you get something that looks like this!

Quick Tip: Use clean hands and mush it altogether so its all combined really well!

Sprinkle oatmeal and sugar mixture on top of the apples and pie crust!

FYI: Mine got super tall and big, if you don't want it as big you can cut the apples even smaller and pealing the apples will also make it smaller as well!

Now put it in a preheated oven for 35 to 40 minutes


When its done remove it from the oven


Serve while its still warm!  Its super yummy with vanilla ice cream! Enjoy!


Apple Crisp Pizza

Ingredients:
Pastry for single-crust pie (9 inches)
2/3 cup sugar
3 tablespoons all-purpose flour
1 teaspoon ground Cinnamon
4 medium apples (like Gala, Fiji, Braeburn, Empire) peeled and diced into 1/4 inch pieces

TOPPING:
1/2 cup all-purpose flour
1/3 cup packed brown sugar
1/2 cup old-fashioned rolled oats
1 teaspoon ground cinnamon
1/4 cup salted butter, softened (see Note)

1/2 cup caramel topping

Instructions:
Note: I like to use salted butter because it cuts the sweetness of the pizza. If you don't use salted butter sprinkle some salt on top of the crisp. Trust me. It brings out the flavors.
Preheat oven to 350 degrees.

Roll pastry to fit a 12 inch pizza pan; fold under edges to give the pizza a bit of a raised crust. Combine sugar, flour and cinnamon in a medium bowl. Add peeled, diced apples and toss. Arrange the apples in a single layer over the pie crust to completely cover it.
For the topping: Combine the flour, brown sugar, oats, cinnamon, and butter in a bowl. Mix well. I like to use my clean hands to get in there and mush it together until it's the texture of wet sand. Sprinkle  topping evenly over the apples.

Bake at 350 degrees for 35-40 minutes or until apples are tender. Remove from oven and immediately drizzle with caramel topping. Cut into pizza slices and serve warm with ice cream. Makes 12 servings

Dont forget if your try this let me know what you think of it in the comments below! Enjoy!!

xoxo
Sarah


Wednesday, September 19, 2012

Laundry Quick Tip: Folding a Fitted Sheet!!

Hey Beauties! Ever folding up laundry and you get to your sheet and the top sheet is easy to fold and looks nice then you get to the fitted sheet and it just looks uneven and takes up a TON of space! yeah! I think we have all been there!! But I was on marthastewart.com when I found this cool chart on how to fold a fitted sheet with step by step instructions and thought I would share it with you!

1. Stand holding the corners of the short end of your sheet.  With the sheet inside out, place one hand in each of the two corners.

2. Bring your right hand to your left, and fold the corner in your right hand over the one in your left, enveloping it. Next, reach down and pick up the corner that is hanging in front; bring it up, and fold it over the two corners in your left hand; the corner that's showing will be inside out.

3. Bring the last corner up, and fold it over the others; with its right side showing, it should envelop the other three corners.

4. Lay the folded sheet on a flat surface and straighten it into the shape shown.

5. Fold the two edges in so all the elastic is hidden.

6. Fold the sheet into a rectangle.

7. Continue folding until the rectangle is the size you want it to be.


 I hope this helps you out next time your folding up laundry, I know it will help me!!

xoxo
Sarah

Tuesday, September 18, 2012


Hey Beauties!! I just recently got back into my YouTube channel and even though it took for ever to edit and YouTube must hate me because I swear I had to reupload it ten times!! but finally its up!! I wore this look all weekend to the rodeo and it lasted all day! without looking bad!! So if you try this look out post a picture to my Facebook or Twitter, and what YOU thought of it!! Enjoy!


xoxo
Sarah

Sunday, September 9, 2012

Recipe: Bacon Maple Cookies! :)


Hey Beauties!

At the first of the year the little bakery in my town had cupcakes, not any ordinary cupcakes, bacon maple cupcakes!!! and of course I got one! and let me tell you they were to die for! So a couple months ago I got thinking "Hey! I should make bacon maple cupcakes!!" and Shane was all "No you should make bacon maple cookies!" (he's more of a cookie fan) Plus! cupcakes tend to be an all day event!  So today when I started to make them (I have family coming down from Utah) I thought "Hey! I shouldn't keep this delicious recipe all to my self!" So here you go...

BACON MAPLE COOKIES!!!
with pictures ;)


  • 1 c. butter or margarine, softened
  • 3/4 c. brown sugar, packed
  • 3/4 c. sugar
  • 2 eggs
  • 1 t. maple extract or 1 T + 1 t. maple syrup
  • 2 1/3 c. flour
  • 1 t. baking soda
  • 1/4 t. salt
  • 1/2 – 1 lb. bacon, cooked, crumbled and well drained


1. In a large mixing bowl, beat together butter or margarine, brown sugar and sugar until fluffy. Stir in eggs and maple extract or syrup. Beat for 1 more minute.
2. In a small bowl, combine flour, baking soda and salt. Stir to combine and add in batches to mixing bowl. Beat just long enough to incorporate.
3. By hand, stir in the bacon pieces. Drop by tablespoons onto cookie sheets. Bake at 375 degrees for 8-10 minutes, until golden brown.

Also if you try this recipe let me know what you think in the comments below! 

xoxo
Sarah 


Friday, September 7, 2012

Clean Living: 7 Mood Foods

So I was looking around on Pinterest (I'm kinda addicted) and I found this super cool chart on "7 Foods That Beat The Blues" I thought hey! this could come in handy sometime, not only for me but maybe you guys too! So after I saw the cute chart on Pinterest I went into research mode and wanted to find out what was it about these foods that helped? Find out below! :)

1.) Stressed after a long day? Grab a piece of Chocolate: Ever feel super stressed after a long day of work or school, now you have a simple fix! Grab some chocolate preferably dark and it will help with stress.  According to a study by Francois-Pierre Martin, Sunil Kochhar and colleagues if you eat about an ounce of dark chocolate everyday for 2 weeks it helps with stress, plus its super good! Not only does dark chocolate help with stress, it can help reduce the risk of heart disease, other diseases and physical conditions as well as helping to ease emotional stress.  Now if your like me you are probably thinking "What is in it, that makes it so healthy?" well I have got an answer! Dark chocolate has a high concentration of antioxidants mainly flavonoids, this is were it comes in a helps with blood flow which in turn helps your health! Fun fact! Did you know that chocolate is actually a vegetable! Chocolate is derived from the seeds of a fleashy pod from the fruit of a Cacao tree.  The scientific name is Thembroma Cacao, which means "Food Of The Gods"

2.) Can't get going? Whip up a yummy spinach salad: Ever sitting at work or school and feeling down and sluggish? Grab a spinach salad!!  Spinach is probably one of the healthiest thing you can eat, it is loaded with vitamin K and A, vitamin K is important for bone health especially when combined with calcium and magnesium, other great thing in spinach! Vitamin A helps lower cholesterol, which is  amplified when combined with vitamin K. Plus! were not done yet! Spinach also has spades, a combination that also helps reduce inflammation, particularly in people with asthma, joint problems, and arthritis.  Spinach is also and excellent source of folate, which helps with blood health. Spinach also has magnesium in it which helps to regulate blood pressure and prevent heart disease.  When spinach is cooked it is also a excellent source of iron, which helps boost and ENERGY and metabolism.  And spinach will help with clear skin!!

3.) Feeling a little cranky? Grab the peanut butter and and apple and lets go!: If you get cranky when your hungry(like me) then this is the perfect quick snack to take with you or whip some up at home! Apple slices and peanut butter are a great snack because not only are they quick and yummy but the apple slices have natural sugars so you wont have a sugar crash and if you use a peanut butter such as Adams it real peanuts so you have lots of protein and more omega-3!

4.) Anxious about something? Try a salmon burger:  Yes! I understand not everybody likes fish(me being one of them) but for those out there that do! Try a salmon burger to help with anxiety! Salmon is packed with omega-3 which help reduce cholesterol, and reduce inflammation throughout the body which help prevent heart disease.

5.) Angry? Brew up some green tea: Green tea does pretty much everything! It helps prevent cancer, reduces the risk of heart disease, helps immune system and some researchers say it help prevent tooth decay!  Green tea is full of antioxidants and they destroy free-radicals that cause cancer.  Green tea also helps speed up your metabolism which aid in weight loss and give you energy!

6.) Feeling sad :( Grab your favorite HEALTHY cereal: If you put milk on your cereal(who doesn't?) Milk has vitamin D which promotes proper us of calcium which helps grow strong healthy bones. Milk also has vitamin A which helps regulate cell growth and keeps a healthy immune system. Along with vitamin A and D it also has vitamin B which is necessary to convert food to energy, milk also has carbohydrates which provides fuel for active adults, calcium which helps build strong bones, the protein in milk contains amino acid building blocks and three glasses of milk is about half of the daily proteins adult need. The cereal contains carbohydrates that give you energy some cereal contain more then other.

7.) PMS'ing? Have a egg salad sandwich: This one is perfect if it's "Your time of the month" Eggs are and excellent source of protein and vitamin B, not just that but the enhance bone health, help prevent development to allergies, contribute to weight loss, enhance brain activity, boost energy, and reduce blood pressure and thats just a little of what they do! If you make it on whole grain bread its even better for you, whole grain are packed with vitamins B, antioxidants, and trace minerals. Whole grains have been shown to reduce the risk of heart disease, and some forms of cancer.


So what do your think!? if you have any foods you go to when your in a mood let me know in the comments below! :) 

xoxo
Sarah Bess

The Perfect Spiral Curls!

Hey Beauties!

 Today I will be showing you how to get these perfect tight spiral curls, without having to stand in the bathroom with a little curling iron all day! Plus! because you wrap your hair in tin foal, it helps protect your hair from heat damage, Double plus!!


What You'll Need:
Heat Protectant
Flat Iron
Tin Foal
Hair Spray
Clips (to section your hair off)
Shine Spray (optional)

Step 1: First you are going to want to spray your hair with your heat protectant. Then your going section your hair off, from about the tip of your ear down then taking your clips and pinning the rest up.

Step 2: Next your going to take about a inch to 1/2 an inch piece of hair and wrap it around your finger, then taking a little piece of tin foal and CAREFULLY setting the rolled up piece of hair onto the tin foal then folding it up around the piece of hair, and continue to section, wrap, fold!

Step 3: Once you have finished your section, wrap, fold process you are going to take your flat iron and taking your wrapped sections, one section at a time placing your flat iron on it for about 3 to 4 seconds, maybe a bit longer and releasing, then repeat until you have your whole head done!

Step 4: Now you are going to unwrap the tin foal and watch as crazy spiral curls unfold, literally! then spraying them with a little hairspray, then if you want you can spray a little shine spray to make it all shiny and pretty! And your DONE!!!
Enjoy and remember if you try this look out to either post a pic to my Facebook or Twitter!

xoxo
Bess

Thursday, September 6, 2012

How to "TIE DYE" your nails!!

Hey Beauties!!

I really love tie dye and have been trying to find a easy way to tie dye my nails! and I finally found it and thought I would share it with you! :)

Even though Summer is over:( I still thought this would be a fun and bright way to hold onto a little bit of Summer!!


How to tie dye your nails source creating really awesome free things
Thing You Will Need:
White nail polish (or any other color) This will be your base coat!
Your choice of 4 or 5 nail polishes, you can use more or less. these will be your tie dye colors!
Your favorite top coat, mine is one called Out The Door and you can pick it up at your locale Sallys!
Tape
A bowl
Toothpick
Nail polish remover

Lets get started!!


Step 1: First you are going to paint your nails with your base coat, you will only need to do one coat( if you do more than that your nail polish will get thick and wont dry!) Once you are done with that you are going to take your tape and cover as much of your cuticle with it as possible, this will prevent getting nail polish all over your hands, which in turn is less clean up!

Step 2: Next in your bowl you are going to fill it about 3/4 of the way up and start making a bulls eye by dropping in your nails polish in the color order you want! Then take your toothpick and start making a design of your choice!

Step 3: Place your nails in to the bowl with your palm up, and dip them into the bulls eye. Then when your nails dry peel off the tape and clean up were you didn't get with the tape with your  nail polish remover, put on your top coat and Enjoy!!

Stay Beautiful! :)